
Create a new asset by clicking the Create Asset button on the top of the Calculator's dashboard page.
Create asset.
This will bring up the Asset Information panel.

Asset information.
Here, add detail about the asset in question:
When you've filled out all the necessary data, click Save and proceed to the Asset-level analysis screen.
On saving the asset, you will be redirected to the asset-level analysis page with an automatically created set of scenarios specific to your asset.
After its initial creation, all changes to the asset and its scenarios are automatically saved.
On the Dashboard page, a previously saved asset can be loaded by clicking the Load Asset button within an Asset Card on the dashboard. The card contains some information describing the building for cases when the title alone is not descriptive enough.

Load asset from the dashboard.
The most recently edited asset can always be reloaded by navigating directly to the asset-level analysis page in the left navigation bar.

Asset analysis is always available via the left navigation bar.
In the asset-level analysis page, you will see a list of all current scenarios in a list on the left and a set of figures which visualize the results in a panel on the left. You can switch between figures using the titles above the figures to the right.
The Summary tab provides a tabular overview of all the scenarios, as well as dot plots comparing key metrics between them. Hovering your cursor over the column headers will give an explanation of that metric.

Summary tab.
The Optimization tab enables you to plot possible decarbonization scenarios on a chart with user-defined axes (ex: investment required vs total emissions). You can filter the scenarios to identify those that meet your criteria (ex: cost payback is less than 10 years), and add select scenarios to the asset by clicking on the dot within the chart, and clicking "Add Scenario to Asset".
Note: each time the "Edit Asset" or "Edit Costs" modals are modified, the optimization must be regenerated.

Optimization tab.
The Energy Use tab shows the annual energy use for each scenario by end use. Hovering over any of the bars will give you energy consumption by end use category for that scenario.

Energy use tab.
The Time Series tab shows cumulative cost or carbon emissions over time. Hovering your cursor over any year will give you information for each scenario in that year.

Time series tab.
The Emissions vs. Cost tab shows total cost plotted against total emissions, evaluated over the entire time horizon. Hovering your cursor over any point will give you total cost and total emissions data for that scenario.

Emissions vs. cost tab.
For Assets located in the USA, an additional NYC LL97 Analysis Tab can be added by clicking Edit Asset, and then selecting Add NYC LL97 Analysis Tab.

Add NYC LL97 analysis tab.
The NYC LL97 tab shows annual penalties (cost) or annual carbon emissions in comparison to the LL97 limit. Hovering your cursor over any year will give you information for each scenario in that year.

NYC LL97 tab.
For more information on LL97 and how it was integrated within the Building Decarbonization Calculator, click here.
An additional CRREM Analysis Tab can be added by clicking Edit Asset, and then selecting Add CRREM Analysis Tab.

Add CRREM analysis tab.
The CRREM tab shows annual operational carbon emissions in comparison to the CRREM limit. Hovering your cursor over any year will give you information for each scenario in that year.

CRREM tab.
For more information on CRREM, its methodology, and how it was integrated within the Building Decarbonization Calculator, click here.
To modify the asset's information, click the Edit Asset button on the top of the Calculator's asset page.
This will bring up the Asset Information panel.
Asset information.
Here, you will be able to some of the asset's details. Note, some asset details cannot be modified after creating an asset.
After modifying the details, click SAVE to proceed to the Scenario analysis screen.
Edit the asset's cost data by clicking the Edit Costs button on the top of the Calculator's asset page.
This will bring up the Asset Costs panel.
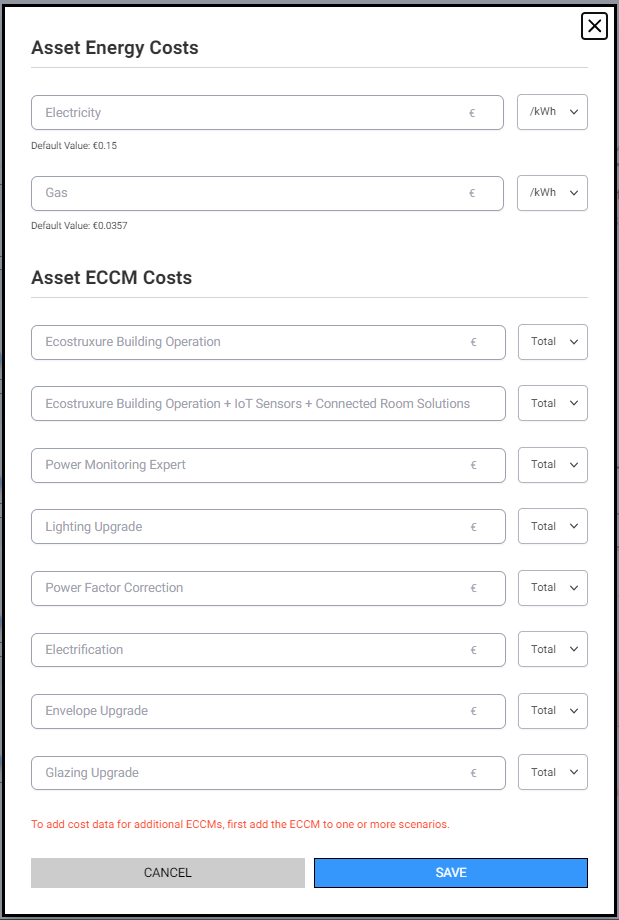
Asset energy costs and ECCM costs.
Here, enter custom Electricity and Gas costs. If the fields are left blank, default values will be used. If necessary, modify the currency units in the Settings menu.
Additionally, custom ECCM costs can be entered for each ECCM in use. Note, an ECCM must first be added to at least one of the asset's scenarios before custom cost data can be input.
After inputting custom Asset Costs, click SAVE to proceed to the Scenario analysis screen.
Create a new scenario by clicking the Create Scenario button on the top of the Calculator's asset page.
This will bring up the Scenario Information panel.
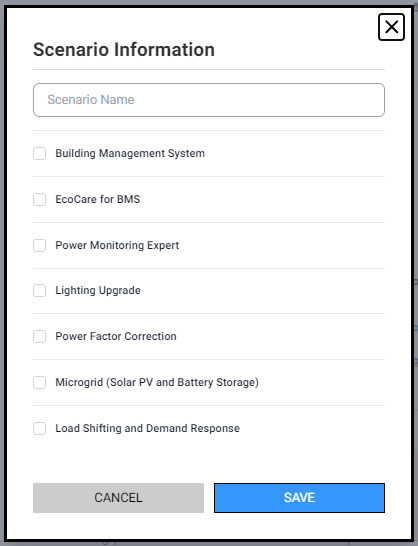
Scenario information.
Here, name the new scenario and select the ECCMs to include in the new scenario. Remember, not all ECCMs are available for all building use types. Read more information on ECCMs.
After selecting the ECCMs, click SAVE to proceed to the Scenario analysis screen.
The Print Report tab allows you to prepare a shareable PDF file, which can be downloaded or shared on the internet via "secret link."
The Generate PDF Report button will generate a PDF with all the results and figures available in the application. Once a PDF is generated, it will be displayed within a frame in the app.
This PDF is not automatically regenerated when you update the scenarios. If the text by the report reads Report does not reflect recent changes then you have made changes to the asset which are not currently reflected in the PDF. In this case, you will need to re-generate the PDF to synchronize it with the recent changes in the app.
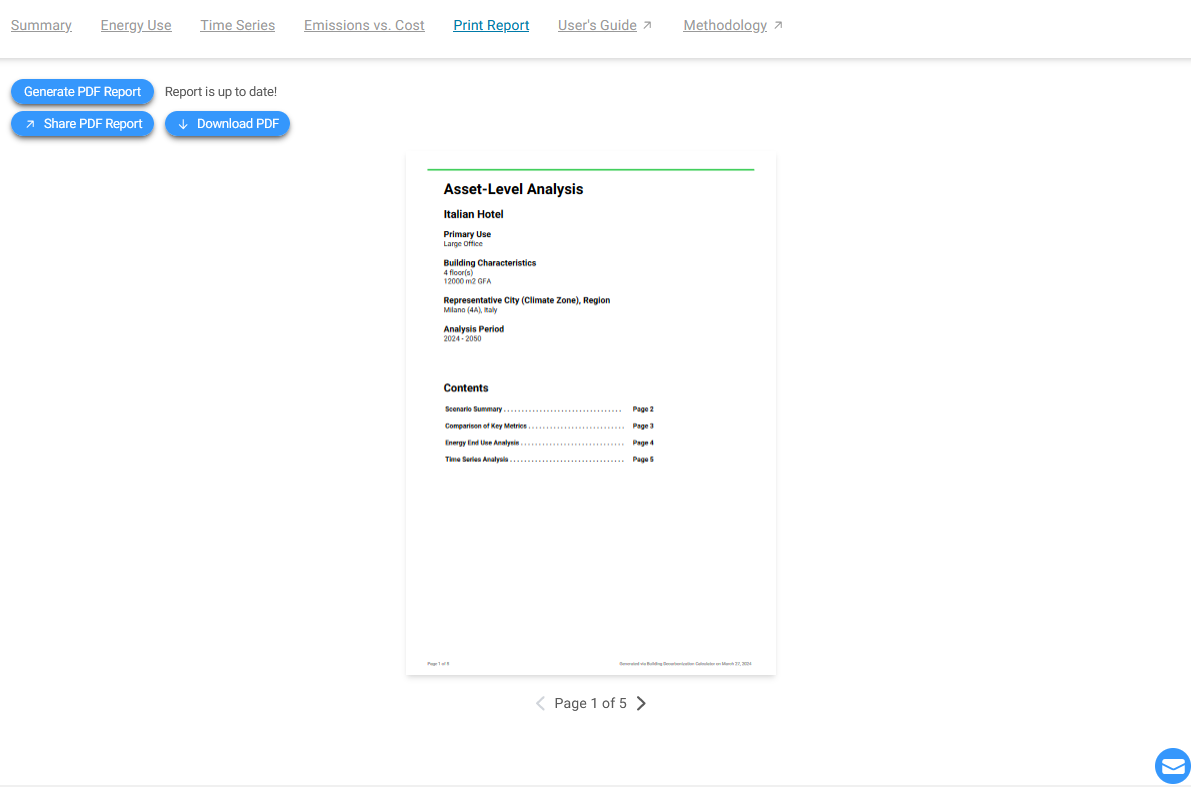
Open toolbar
View PDF in app.
To save a PDF report to your local computer, press the ↓ Download PDF button.
To create a sharable link for a PDF report, click the ↗ Share PDF Report button. This will open a panel from which you can copy a sharable link. This link should be considered as confidential as the project information contained within the report.
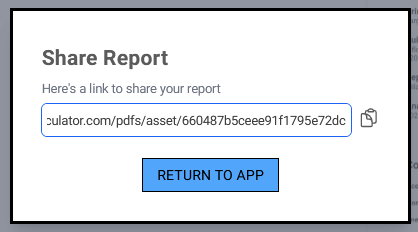
Generate a sharing link for the PDF.
The link can be shared with partners who do not have access to the application.